

IT IS DONE
I finished the blanket chest. After nearly a year, a few dozen hours of actual work, a ton of self-doubt and self-loathing, and plenty of trial and error, it is done.
Those of you who’ve followed this blog for a while know that I’m really, really, really bad at getting stuff done that I say I’m going to do. Like for serious, it’s terrible. I originally started this blanket chest last year to give as a wedding gift to friends of mine who were getting married last September. Needless to say, it didn’t get done in time, and continued to not get done because of a bunch of personal stuff that was only exacerbated by my failure to finish the chest. But I pulled myself out of that funk and got it done. And now, I’m going to share it with you, dear readers, in all its hand-made glory.

BOOM! There it is!
Doesn’t look like much from the outside, does it? It really isn’t anything that special. It’s made of 100% clear white pine (which costs a bundle; I’ll go with #2 next time and just get the least knotty stuff I can if I make one for myself), finished with boiled linseed oil and paste wax, and held together with nails. However, when you get into the details, it’s a bit more complex than it looks.
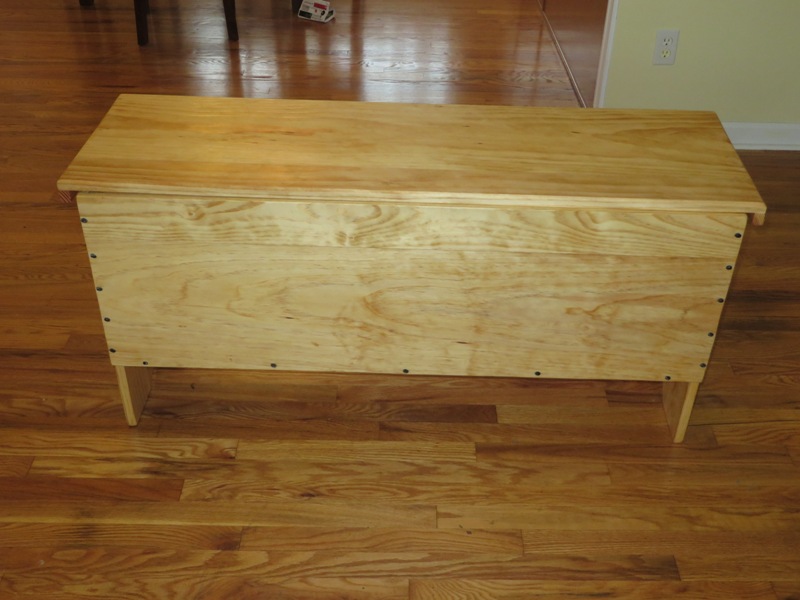
Nail and glue joint locations are actually important.
First, let’s look at how this thing is put together. This is the front of the chest. You can see if you look at the picture above that there is a glue joint in the front panel running from side to side about 4 inches from the top. There’s actually a glue joint in every panel used to make this chest. The pieces were glued up and then cut specifically so that the glue joints would be in places where maximum strength was assured. While the location of the glue joints for the front, bottom, and sides wasn’t that important, for the top and back it was. The panels are all about 16″ wide, made up of a 1×12 and 1×4 board glued together. The stress on the back and top when the top is lifted could theoretically cause the glue to eventually fail. Because of that, I placed the glue joint towards the front of the top and towards the bottom of the back. That way the joints would be as un-stressed as possible when the top is lifted. You can see the glue joint in the top panel the in the next picture:
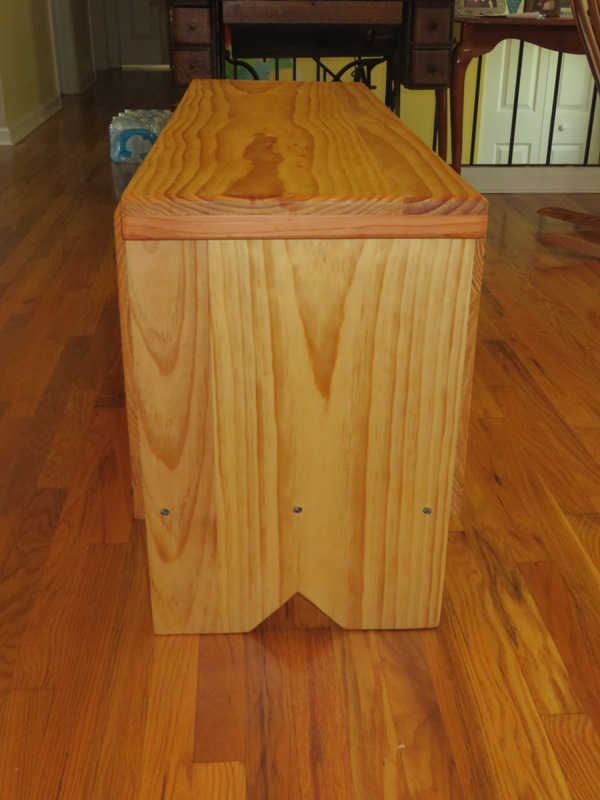
3 of the key design elements of the chest: Cleats, nails, and rabbets. Boot jacks are just for show.
As the caption says, there are 3 other important design elements exhibited here: The cleats, the nails, and the panel rabbets. The cleats are the strips of wood nailed to the ends of the top panel. They serve a dual purpose: keeping the lid from warping and helping keep the lid from splitting apart. They’re not glued in place, however. They, like the carcase of the chest itself, are nailed. Specifically, with clinched nails. The nails are driven in place and then bent over to hook them into the top of the lid. This keeps them place even if the wood shrinks and dries over time. The lack of glue allows for the wood to move as the humidity changes, which is critical to keep the lid in one piece.
The rest of the carcase is the same way: It’s nailed together, with no glue except in the panels. As in the lid, the nails allow for the wood to move as it dries and the humidity changes over the course of years. Were the panels glued together, even with screws, there would be a high chance of the glue failing over the years, or of the panels cracking.
The last key element is the panel rabbets. The front and back, as you can see, are a bit thinner on the ends than the rest of the wood used in this project. That’s because there are rabbets cut on the ends and bottom of each panel to allow the case to more easily be fitted together prior to nailing. This makes the case easier to clamp up and makes the joints more rigid. What’s not visible is the dadoes that were cut along each end board for the bottom of the chest to fit in. In this way, the bottom is secured both with nails and with the dadoes. It’s quite sturdy, all in all.
FEED ME, SEYMOUR
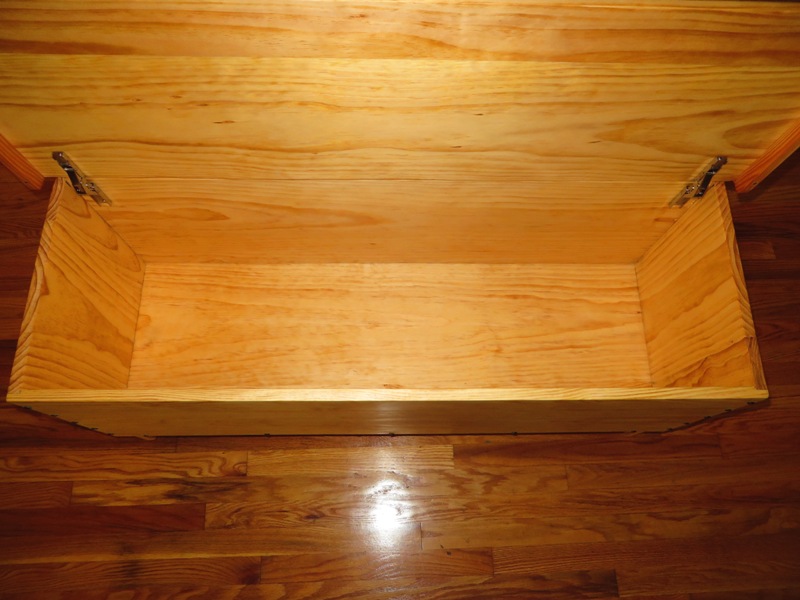
So let’s get to the next important part: Hinges. I used a set of locking hinges from Lee Valley. I forget the exact part number. They’re nice and easy to install. No mortising required, just screw them in place and you’re good to go. I used 7/8″ No. 8 screws and didn’t drill pilot holes. Pine is soft enough that you really don’t need them. I did have to re-do one side, though, when my measurements didn’t quite match the shape of the board. Oops. But it worked!

Screws, pistons, and other modern contrivances.
You can also see that my rabbet cuts were…less than flush. I did every single cut by hand. Every. Single. One. Next time, I’m going to use my router (which I didn’t have when I did these panels). I wanted to do this one completely by hand if I could, though. I wanted to know that I had the skills if I ever ended up needing them.
This project was a wonderful learning experience for me. I built a beautiful piece of furniture for some dear friends that will hopefully last them for many, many years; I learned a ton of new hand tool skills; and I think most importantly I started the process of rebuilding my self-esteem that’s been dangerously low for most of my life. I think this last picture sums up my feelings upon completing this chest pretty well:

Heck yeah, I’m awesome!
So until next time, keep on pluggin’ away. Happy brewing!
Skål!

We love the chest. It is filled with blankets at the foot of our bed. Fantastic work Josh. A+